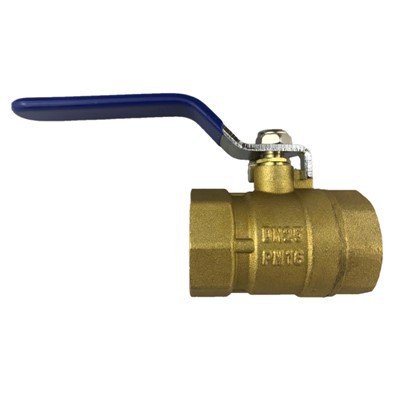
Hey there! As a supplier of Stainless Steel Ball Valve, I know how important it is to keep these valves clean and in top - notch condition. A well - maintained stainless steel ball valve not only lasts longer but also performs better, ensuring smooth operation in various applications. So, let's dive into how to clean a stainless steel ball valve.
Why Cleaning is Crucial
First off, you might be wondering why cleaning a stainless steel ball valve is such a big deal. Well, over time, dirt, debris, and even corrosion can build up inside and outside the valve. This can lead to reduced flow rates, leaks, and even complete valve failure. When a valve fails, it can cause disruptions in your system, whether it's in a water supply, a chemical processing plant, or a heating system. So, regular cleaning is like giving your valve a little health check - up.
Tools You'll Need
Before you start cleaning, gather the necessary tools. You'll need a soft - bristle brush, mild detergent, a clean cloth, and some lubricant. The soft - bristle brush is great for getting into those hard - to - reach places without scratching the stainless steel surface. Mild detergent will help break down any grease or grime, and the clean cloth is for drying and polishing. The lubricant is essential for ensuring the valve operates smoothly after cleaning.
Step - by - Step Cleaning Process
Step 1: Shut Down the System
Safety first! Before you start cleaning, make sure to shut down the system where the ball valve is installed. This will prevent any accidental flow of fluids or gases while you're working on the valve. Also, relieve any pressure in the valve by opening it slightly to let out any trapped pressure.
Step 2: Remove the Valve
If possible, remove the ball valve from the system. This will give you better access to all parts of the valve for a thorough cleaning. Use the appropriate tools, like wrenches, to loosen the connections and carefully take out the valve.
Step 3: Disassemble the Valve
Once the valve is removed, disassemble it. This usually involves removing the stem, the ball, and the seats. Be careful when taking apart the valve, as some parts may be under spring tension. Keep all the parts organized so you can easily put them back together later.
Step 4: Clean the External Surface
Start by cleaning the external surface of the valve. Dip the soft - bristle brush into the mild detergent solution and gently scrub the valve body. Pay special attention to any areas with visible dirt or grime. Rinse the valve thoroughly with clean water and dry it with the cloth.


Step 5: Clean the Internal Parts
Now, it's time to clean the internal parts. Soak the ball, seats, and stem in the detergent solution for a few minutes. Use the soft - bristle brush to scrub away any dirt or debris from these parts. Make sure to clean all the crevices and holes. Rinse the parts thoroughly with clean water and dry them completely.
Step 6: Inspect for Damage
While the parts are dry, take a close look at them for any signs of damage, such as scratches, cracks, or excessive wear. If you notice any significant damage, it might be time to replace the part. You can check out our Stainless Steel Globe Valve or Stainless Steel Y Strainer if you need replacement parts or additional components for your system.
Step 7: Lubricate the Parts
Apply a small amount of lubricant to the ball, seats, and stem. This will help the valve operate smoothly and prevent future corrosion. Make sure to use a lubricant that is compatible with stainless steel and the fluids or gases that will pass through the valve.
Step 8: Reassemble the Valve
Once all the parts are clean, dry, and lubricated, it's time to reassemble the valve. Put the parts back together in the correct order, making sure everything fits snugly. Tighten the connections carefully, but don't over - tighten as this can damage the valve.
Step 9: Reinstall the Valve
After reassembling the valve, reinstall it in the system. Make sure the connections are secure and there are no leaks. Turn on the system and check the valve's operation to ensure it's working properly.
Tips for Regular Maintenance
To keep your stainless steel ball valve in great shape, here are some tips for regular maintenance:
- Inspect regularly: Check the valve for any signs of leaks, corrosion, or damage on a regular basis.
- Clean periodically: Even if the valve seems to be working fine, clean it every few months to prevent dirt and debris from building up.
- Use the right lubricant: Make sure to use a lubricant that is suitable for the valve and the operating conditions.
Conclusion
Cleaning a stainless steel ball valve is not as complicated as it might seem. By following these steps and tips, you can keep your valve in excellent condition and ensure its long - term performance. If you have any questions about cleaning or maintaining your stainless steel ball valve, or if you're looking to purchase a new valve or replacement parts, don't hesitate to reach out. We're here to help you with all your valve needs. Whether you're a small business owner or part of a large industrial operation, we've got the right solutions for you. So, get in touch and let's start a conversation about your valve requirements!
References
- General knowledge from years of experience in the valve industry.
- Industry best practices for valve maintenance and cleaning.